Is your sewing room a creative haven or a chaotic war zone? Because, IMO, most of us live somewhere in between. I mean, who hasn’t lost a pair of scissors under a mountain of fabric? (FYI, mine once turned up in the fridge. Don’t ask.)
If your “sewing space” currently looks like a crime scene made of thread, buttons, and regret, don’t panic. Every pro crafter started there too. The good news? You don’t need a massive studio or Pinterest-perfect shelves to pull it together. You just need a few smart systems — and maybe the courage to let go of that “someday I’ll fix it” pile.
So grab a cup of coffee (or a measuring tape, whichever you reach for first), and let’s talk about how to organize your sewing room like a pro crafter — without losing your mind or your favorite seam ripper.
Step 1 — Declutter Like You Mean It

Before you even think about fancy bins or color-coded labels, you need to face the mess. I know, it’s painful. But you can’t organize clutter — you can only rearrange it.
Start by pulling everything out. Yes, everything. The fabric stash, the tangled thread drawer, the stack of half-finished projects you swore you’d finish “next weekend.” Pile it up where you can see it, then grab three boxes labeled: Keep, Donate, and Trash.
Here’s your no-nonsense declutter checklist:
- Keep what you love and use. If it sparks joy and you’ve used it in the last year, it stays.
- Donate or toss what you don’t. Someone else might love that fabric you’ve been ignoring since 2010.
- Be ruthless. If you have six seam rippers, pick a favorite and move on.
Pro tip? Turn on some upbeat music. It’s harder to feel guilty about tossing stuff when Beyoncé’s cheering you on.
When you’re done, take a deep breath. That’s the sound of creative freedom (and maybe a little fabric dust).
Step 2 — Create Crafting Zones That Actually Work

Now that you’ve wrestled your clutter monster, it’s time to set up zones that make sense. Every pro crafter swears by this — not because it looks nice, but because it saves you time and sanity.
Here’s what your main zones might look like:
- Cutting Zone: A clear table or surface for trimming fabric. Keep your rotary cutter, rulers, and cutting mat here — not buried under fabric scraps.
- Sewing Zone: Your machine, your favorite chair, and a small side table for threads, scissors, and pins. Everything should be within arm’s reach.
- Pressing Zone: Your iron, ironing board, and spray bottle. Bonus points if it’s near an outlet so you’re not tripping over cords.
- Storage Zone: Shelves, drawers, or carts for everything else — from fabric to zippers to the random buttons you collect “just in case.”
When I finally stopped running mini-marathons between my cutting table and machine, my sewing life changed. Projects got smoother, faster, and way less rage-inducing.
Ever noticed how much easier it is to create when everything’s where your brain expects it to be? That’s not coincidence — that’s good zoning.
Step 3 — Master the Art of Storage

Storage is where your sewing room either shines or implodes. You don’t need a designer setup — just smart solutions that suit you.
Fabric Storage That Doesn’t Make You Cry
Let’s start with the obvious culprit: fabric. Somehow, it multiplies like rabbits. One day you’re buying “just a few fat quarters,” and the next, your stash could clothe a small village.
Here are a few tried-and-true storage ideas:
- Open shelving if you like seeing your options.
- Cubbies or bins if you prefer tidy minimalism.
- Comic book boards or file folders to fold and label pieces neatly.
I tried rolling my fabric once — never again. Folding works better because it stays neat longer, and you can see exactly what you have. And if you sort by color? Chef’s kiss. It looks incredible and saves serious time when you’re matching prints.
Pro tip: Store fabric vertically so you can flip through like records. Way easier than digging through piles.
Tool & Notion Organization
Now, about those tools. Seam rippers, needles, scissors, rulers, and the mysterious “thingy” you forgot the name of.
Try this combo:
- Drawer dividers for the small stuff.
- Magnetic strips for scissors and metal tools.
- Pegboards for thread spools, rulers, and frequently used gadgets.
Pegboards are a crafter’s best friend — practical and Instagram-worthy. Plus, if you can see it, you’ll actually use it.
Also, rhetorical moment: how many seam rippers does one person really need? (Apparently five, if you ask me. Don’t judge.)
Pattern & Project Management
Patterns and half-finished projects are where chaos loves to hide.
Here’s how to tame them:
- Use binders with clear sleeves for printed patterns.
- Store PDF ones digitally — labeled clearly on your computer (no more “PatternFinalNEW2.pdf”).
- Create a “Work in Progress” bin for projects in limbo. It keeps them visible but contained, which helps prevent the “out of sight, out of mind” trap.
Personally, I call mine the “Someday Pile.” It’s… substantial. But at least it’s neat.
Step 4 — Label Everything

Listen, labels aren’t just for neat freaks. They’re for anyone who’s ever spent ten minutes hunting for elastic that was right there yesterday.
Label your bins, drawers, and boxes. Go basic or get fancy with a label maker — whatever sparks joy.
Examples:
- Fabric bins: “Cotton,” “Linen,” “Stuff I Swear I’ll Use Someday.”
- Tool drawers: “Zippers,” “Thread,” “Random Mystery Bits.”
The beauty of labeling? Future You can’t argue with it. The bin literally says “Buttons.” End of story.
Pro tip: Use clear containers when possible. They make it easy to see what’s inside, and your space instantly looks more organized (even if you still have a small hoarding problem).
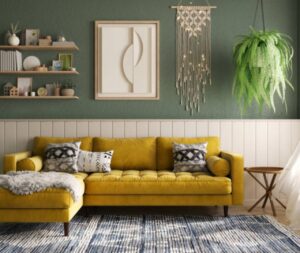
Step 5 — Lighting and Decor That Inspire Creativity

If your sewing room feels like a cave, you’ll avoid it. Lighting is everything.
Natural light is the dream, so if you can, position your cutting or sewing table near a window. If that’s not an option, get daylight LED bulbs — they mimic sunlight and keep colors true.
Next, let’s talk decor. You don’t need a magazine setup, but adding a few touches can seriously boost your creative energy. Think:
- A cute plant or two.
- Wall art that makes you smile.
- A colorful pin cushion corner (yes, that’s a thing).
I once swapped a boring fluorescent light for a warm lamp and instantly started sewing more often. Coincidence? I think not.
Because honestly — who said organized spaces can’t be a little fabulous?
Step 6 — Keep It Real with Simple Maintenance
Here’s the truth: even pro crafters make messes. The difference is, they clean up faster.
Instead of waiting for chaos to build up, do a five-minute daily reset.
- Put tools back where they belong.
- Fold any fabric scraps you want to keep.
- Toss threads and trash.
If you make this part of your routine, your sewing room will always look decent — even mid-project.
I personally clean up while waiting for the iron to heat up. Two birds, one stone. Multitasking level: elite.
And hey, reward yourself afterward. Coffee, a snack, or the quiet satisfaction of knowing exactly where your bobbins are.
Because let’s face it — consistency beats chaos every time.
Sew Organized, Sew Happy
So, to recap:
- Declutter ruthlessly.
- Set up zones that make sense.
- Use smart storage.
- Label everything.
- Light it well.
- Keep it up with small daily habits.
That’s the secret sauce behind every “pro” crafter’s workspace. Not perfection — just good systems and a little humor when things go sideways.
Now go grab a trash bag and your favorite playlist. It’s time to turn that fabric jungle into a creative sanctuary.
And if you happen to find your missing scissors during cleanup… send me a DM. Mine are still MIA.